Difference between revisions of "Extracting game files"
(→On Windows) |
|||
| Line 5: | Line 5: | ||
<pre> | <pre> | ||
| − | PACKAGER.exe | + | PACKAGER.exe --unpack=res/assets.bin --destination=assets |
</pre> | </pre> | ||
| Line 11: | Line 11: | ||
<pre> | <pre> | ||
| − | .\PACKAGER.exe | + | .\PACKAGER.exe --unpack=res/assets.bin --destination=assets |
</pre> | </pre> | ||
[[File:Extracted.png]] | [[File:Extracted.png]] | ||
| − | == | + | == Scenarios == |
| − | + | The same process works for scenarios, except you pass the .bds file to the /u parameter. For example: | |
<pre> | <pre> | ||
| − | . | + | PACKAGER.exe --unpack=scenarios/payload.bds --destination=scenarios/payload |
</pre> | </pre> | ||
| − | + | {{NewBuild|The --sval option currently does not exist, and info.xml is currently not extracted from scenarios.}} | |
| − | The | ||
| − | < | + | Depending on when the scenario was packaged, you will not get an <code>info.xml</code> file. This is the case for scenarios packaged at or before build 181. |
| − | |||
| − | |||
| − | + | In such cases where you don't have the <code>info.xml</code> file but you do need to know its contents, you can get a read-only approximation of this file by passing <code>--sval</code> while unpacking. This will write a serialized <code>info.sval</code> file into the destination folder. This file is not very useful if you intend to take it and modify it, as it's only an approximation. | |
Latest revision as of 11:25, 31 July 2017
The packager tool allows you to package a scenario, but it also allows you to unpack or extract scenarios, as well as base the content from the res/assets.bin file. This is useful if you want to use any of our base resources such as units and scripts, in your mod, or use them as reference material.
On Windows
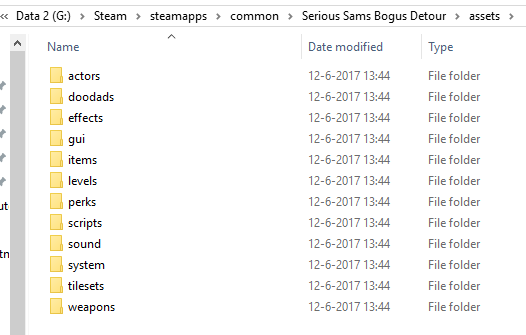
First, navigate to your Bogus Detour installation folder. In this folder, hold down Shift and F10 at the same time to open the advanced shortcut menu. From here, select "Open command prompt here." (On Windows 10 this is Powershell.) You should now see the Windows command prompt in front of you, in the current folder. Then, run the following command, which will extract all files from res/assets.bin into the assets folder.
PACKAGER.exe --unpack=res/assets.bin --destination=assets
On Powershell, you need to call it like this:
.\PACKAGER.exe --unpack=res/assets.bin --destination=assets
Scenarios
The same process works for scenarios, except you pass the .bds file to the /u parameter. For example:
PACKAGER.exe --unpack=scenarios/payload.bds --destination=scenarios/payload
Note
This article is describing features that are currently unreleased, but will be released in a future patch.
- The --sval option currently does not exist, and info.xml is currently not extracted from scenarios.
Depending on when the scenario was packaged, you will not get an info.xml file. This is the case for scenarios packaged at or before build 181.
In such cases where you don't have the info.xml file but you do need to know its contents, you can get a read-only approximation of this file by passing --sval while unpacking. This will write a serialized info.sval file into the destination folder. This file is not very useful if you intend to take it and modify it, as it's only an approximation.
